 ALLPCB


If you're facing challenges with immersion tin soldering on your PCB projects, you're not alone. Issues like dewetting, non-wetting, and general solderability problems can disrupt your surface mount technology (SMT) processes and affect the quality of your boards. In this guide, we'll walk you through the most common immersion tin soldering problems and provide practical solutions to help you achieve reliable results. Whether you're troubleshooting PCB soldering or tackling SMT soldering issues, we've got you covered with actionable advice and detailed insights.
What is Immersion Tin and Why Does It Matter in PCB Soldering?
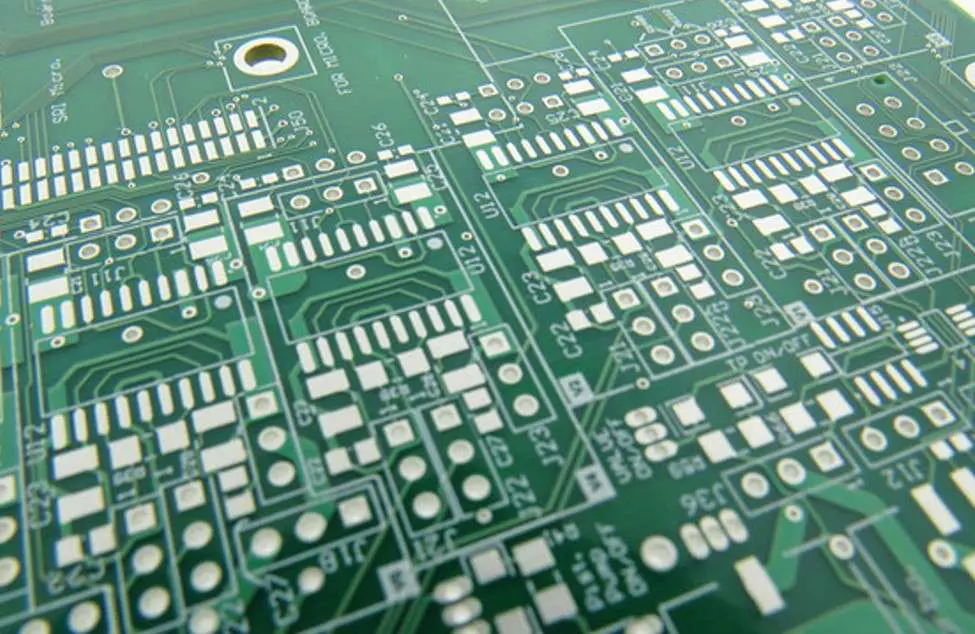
Immersion tin is a surface finish applied to printed circuit boards (PCBs) to protect the copper traces and improve solderability. It involves depositing a thin layer of tin onto the copper through a chemical process, creating a flat, uniform surface ideal for SMT soldering. This finish is popular because it’s cost-effective, lead-free, and compatible with fine-pitch components.
However, while immersion tin offers many benefits, it can also present challenges during soldering. Issues such as immersion tin dewetting, non-wetting, and poor solderability can lead to weak joints, component failures, or even complete assembly issues. Understanding these problems and how to troubleshoot them is crucial for ensuring high-quality PCB assembly.
Related Reading: The Ultimate Guide to Immersion Tin PCB Finish: Advantages, Disadvantages, and Applications
Common Immersion Tin Soldering Problems and Their Causes
Let’s dive into the most frequent issues encountered with immersion tin soldering and explore why they happen. Identifying the root cause is the first step to effective troubleshooting.
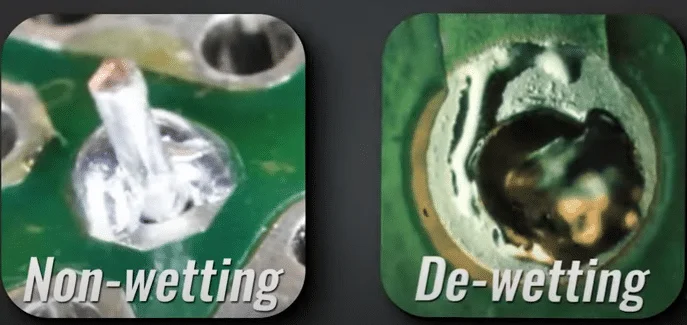
1. Immersion Tin Dewetting
Dewetting occurs when the solder pulls away from the immersion tin surface after initially wetting it, leaving exposed copper or uneven solder coverage. This can result in weak or unreliable solder joints.
Causes:
- Surface Contamination: Oils, fingerprints, or residues on the PCB can prevent proper solder adhesion.
- Oxidation: If the immersion tin layer oxidizes before soldering, it creates a barrier that repels solder.
- Improper Storage: Exposure to humidity or high temperatures can degrade the tin finish over time, leading to dewetting.
2. Immersion Tin Non-Wetting
Non-wetting happens when the solder fails to bond with the immersion tin surface altogether. Instead of spreading evenly, the solder beads up or forms incomplete joints.
Causes:
- Thick Intermetallic Layer: Over time, an intermetallic compound forms between the tin and copper, reducing solderability if it grows too thick.
- Insufficient Flux: Without enough flux to remove oxides, the solder cannot wet the surface properly.
- Poor Tin Layer Quality: If the immersion tin layer is too thin or unevenly applied during manufacturing, it may not support proper soldering.
3. Immersion Tin Solderability Issues
General solderability issues with immersion tin often manifest as inconsistent or weak solder joints across the PCB. These problems can compromise the reliability of the entire assembly.
Causes:
- Shelf Life Expiry: Immersion tin has a limited shelf life, typically 6-12 months, after which its solderability decreases due to oxidation or intermetallic growth.
- Thermal Stress: Excessive heat during soldering can damage the tin layer, leading to poor adhesion.
- Incompatible Solder Paste: Using a solder paste that doesn’t match the reflow profile or the immersion tin finish can result in poor bonding.
Related Reading: Troubleshooting Reflow Soldering Defects: A Practical Guide for Engineers
Troubleshooting Immersion Tin Soldering Problems: Step-by-Step Solutions
Now that we’ve identified the common problems, let’s explore practical solutions to troubleshoot and resolve immersion tin soldering issues. These steps are designed to help you achieve strong, reliable solder joints for both PCB and SMT applications.
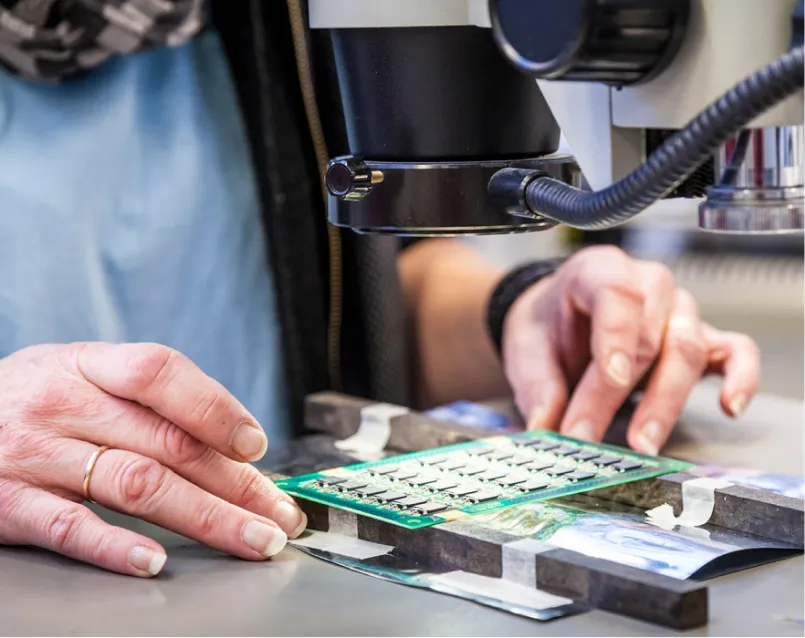
Step 1: Inspect and Clean the PCB Surface
Before soldering, always inspect the PCB for contamination or oxidation. Even small amounts of residue can cause dewetting or non-wetting.
- Use a magnifying glass or microscope to check for discoloration or spots on the immersion tin finish.
- Clean the board with isopropyl alcohol and a lint-free cloth to remove oils, dust, or fingerprints.
- If oxidation is present, consider using a mild abrasive pad to gently remove the oxide layer, but be cautious not to damage the tin finish.
Step 2: Optimize Storage Conditions
Improper storage can degrade the immersion tin finish over time, leading to solderability issues. Follow these guidelines to protect your PCBs:
- Store PCBs in a cool, dry environment with a temperature below 25°C (77°F) and humidity below 50%.
- Use vacuum-sealed or anti-static bags with desiccant packs to minimize exposure to air and moisture.
- Adhere to the shelf life recommendations, typically not exceeding 12 months, to ensure optimal solderability.
Step 3: Use the Right Flux and Solder Paste
Flux plays a critical role in removing oxides and promoting wetting during soldering. Choosing the correct type and amount is essential.
- Select a flux that matches your soldering process (e.g., no-clean or water-soluble) and is compatible with immersion tin.
- Ensure the solder paste has the right alloy composition, such as SAC305 (Sn96.5/Ag3.0/Cu0.5), which works well with immersion tin finishes.
- Apply flux evenly to avoid excess or insufficient coverage, which can lead to non-wetting or solder bridging.
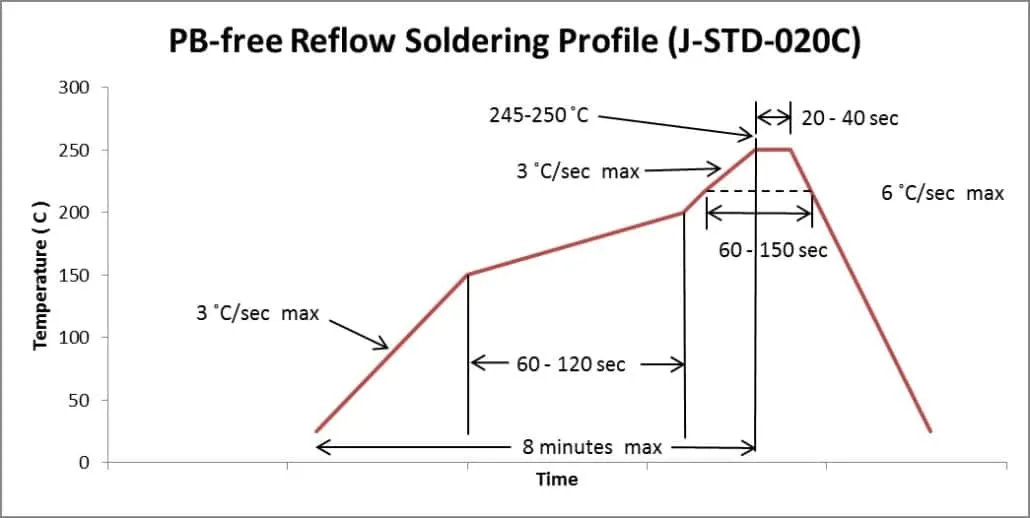
Step 4: Control the Reflow Profile
The reflow soldering process must be carefully controlled to prevent thermal damage to the immersion tin layer. An improper temperature profile can cause dewetting or solderability issues.
- Follow a reflow profile with a gradual preheat stage (1-3°C per second) to minimize thermal shock.
- Keep the peak temperature between 240-260°C for lead-free solder to avoid overheating the tin layer.
- Limit the time above liquidus (TAL) to 60-90 seconds to reduce intermetallic growth and maintain solderability.
Step 5: Monitor Intermetallic Compound Growth
The intermetallic layer between tin and copper grows over time and with heat exposure, potentially causing non-wetting or weak joints.
- If your PCBs are older than 6 months, test solderability on a sample board before full assembly.
- Avoid multiple reflow cycles, as each cycle accelerates intermetallic growth, reducing the tin layer’s effectiveness.
- If intermetallic growth is suspected, consider switching to a fresh batch of PCBs with a newer immersion tin finish.
Preventing Immersion Tin Soldering Problems in SMT Assembly
While troubleshooting is essential, preventing issues in the first place can save time and resources. Here are some best practices for avoiding immersion tin soldering problems during SMT assembly.
1. Work with High-Quality PCB Finishes
The quality of the immersion tin layer directly impacts solderability. Ensure that the tin coating is applied uniformly with a thickness of 0.8-1.2 micrometers, as thinner layers may not provide adequate protection, while thicker layers can increase intermetallic growth.
2. Train Your Team on Proper Handling
Human error, such as improper handling, can introduce contaminants to the PCB surface. Train your team to wear gloves and use anti-static tools when handling boards to prevent oils and dirt from affecting the immersion tin finish.
3. Regularly Calibrate Equipment
Inconsistent soldering equipment can lead to uneven heating or incorrect reflow profiles. Regularly calibrate your reflow ovens, pick-and-place machines, and inspection tools to ensure precision during SMT soldering.
4. Test Solderability Before Full Production
Before committing to a full production run, perform a solderability test using a small batch of PCBs. This can help identify potential issues like dewetting or non-wetting early on, allowing you to adjust your process or materials as needed.
Advanced Tips for PCB Soldering Troubleshooting
For engineers and technicians looking to take their troubleshooting to the next level, consider these advanced strategies to address immersion tin soldering challenges.
1. Use X-Ray Inspection for Hidden Defects
Some solderability issues, such as voids or incomplete wetting beneath components, may not be visible to the naked eye. Use X-ray inspection tools to detect hidden defects in solder joints, especially for BGA (Ball Grid Array) components in SMT assembly.
2. Analyze Intermetallic Layers with Cross-Sectioning
If you suspect excessive intermetallic growth, perform a cross-sectional analysis of the PCB. This involves cutting a small section of the board and examining it under a microscope to measure the thickness of the intermetallic layer, typically aiming for less than 2 micrometers for optimal solderability.
3. Experiment with Alternative Surface Finishes
If immersion tin consistently presents problems in your specific application, consider experimenting with alternative finishes like ENIG (Electroless Nickel Immersion Gold) or OSP (Organic Solderability Preservative). Each finish has its pros and cons, so evaluate based on your project’s requirements.
Conclusion: Mastering Immersion Tin Soldering for Reliable PCBs
Immersion tin soldering problems like dewetting, non-wetting, and general solderability issues can be frustrating, but with the right troubleshooting approach, they are manageable. By inspecting and cleaning your PCBs, optimizing storage and soldering conditions, and following best practices for SMT assembly, you can achieve strong, reliable solder joints every time. Whether you're a beginner or an experienced engineer, these practical tips will help you overcome immersion tin challenges and ensure the success of your PCB projects.
At ALLPCB, we’re committed to supporting your PCB assembly needs with high-quality materials and expert guidance. Keep these strategies in mind, and you’ll be well on your way to mastering immersion tin soldering for flawless results.


