 ALLPCB


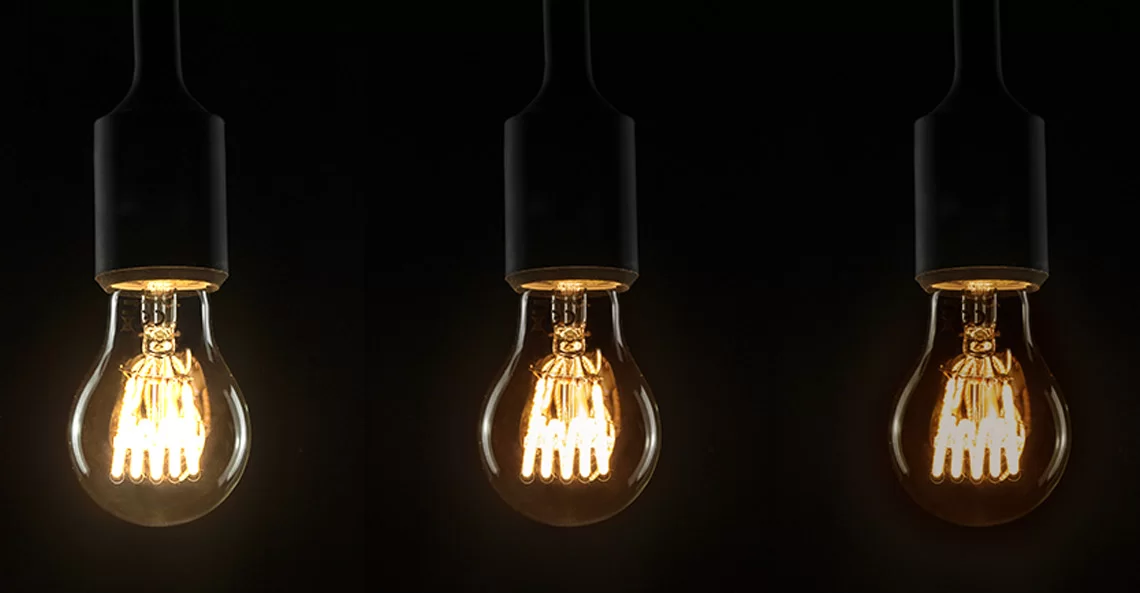
Are you dealing with LED brightness issues such as LEDs dimming after a short time, fluctuating brightness, or lights not being as bright as expected? These problems can be frustrating, especially in critical applications. In this guide, we’ll help you diagnose LED brightness problems and provide actionable solutions to address issues like LED losing brightness over time or unexpected dimming. Whether you’re designing circuits or maintaining systems, this comprehensive resource will walk you through the root causes and fixes for common LED brightness challenges.
Why Do LED Brightness Issues Occur?
LEDs are known for their energy efficiency and long lifespan, but they’re not immune to performance issues. Brightness problems can stem from various factors, including electrical, thermal, and environmental conditions. Before diving into detailed troubleshooting, let’s explore the common reasons behind issues like “LED dim after short time” or “LED brightness fluctuating.” Understanding these causes will help engineers pinpoint the problem quickly and apply the right fix.
Common Causes of LED Brightness Problems
LED brightness issues can manifest in several ways, such as a light not being as bright as expected or losing brightness over time. Below are the primary culprits behind these problems, tailored for engineers looking to diagnose and resolve them effectively.
1. Insufficient Power Supply or Voltage Drop
One of the most frequent causes of an “LED light not as bright as expected” is an inadequate power supply. LEDs require a specific voltage and current to operate at their rated brightness. If the power supply delivers less than the required voltage—often due to long cable runs causing a voltage drop—the LED will appear dim. For example, a 12V LED strip might only receive 10V at the end of a 5-meter run, resulting in a noticeable brightness reduction.
To diagnose this, measure the voltage at the LED terminals using a multimeter. If the reading is below the manufacturer’s specification (e.g., less than 3.2V for a typical white LED), check for voltage drops across connectors or wires. Upgrading to a higher-gauge wire (e.g., 18 AWG instead of 22 AWG) or using a power supply closer to the LEDs can resolve this issue.
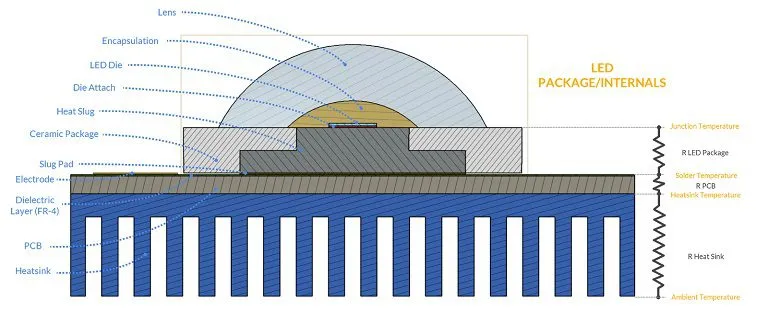
2. Overheating and Thermal Management Issues
LEDs are sensitive to heat, and excessive temperatures can cause them to dim over time, contributing to the problem of “LED losing brightness over time.” When an LED operates above its recommended temperature (often around 85°C for many models), its internal components degrade, reducing light output. Poor heat dissipation, such as inadequate heat sinks or lack of ventilation, exacerbates this issue.
Engineers can diagnose overheating by checking the LED’s surface temperature using an infrared thermometer. If it exceeds the specified limit, consider adding a larger heat sink or improving airflow in the system. For instance, a 1W LED might require a heat sink with a thermal resistance of less than 10°C/W to maintain optimal performance.
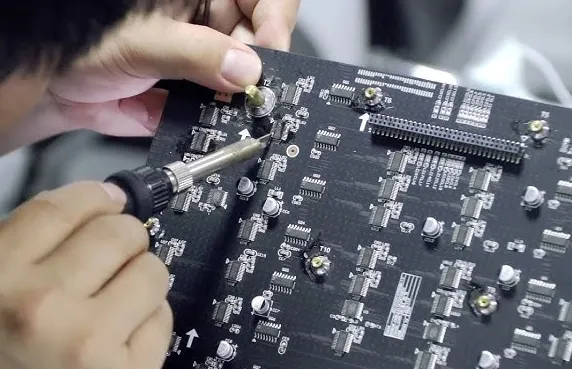
3. Driver or Circuit Issues
The driver circuit plays a critical role in regulating current to the LED. A malfunctioning or incompatible driver can lead to “LED brightness fluctuating” or dimming after a short time. For example, a constant-current driver rated for 350mA will cause flickering or dimming if paired with an LED requiring 700mA. Additionally, driver components can fail over time due to poor quality or overloading, resulting in unstable output.
To troubleshoot, test the driver output with a multimeter to ensure it matches the LED’s current and voltage requirements. If discrepancies are found, replace the driver with one that matches the specifications. Always choose drivers with a 10-20% higher capacity than needed to prevent overloading.
4. Aging and Degradation of LED Components
Over time, LEDs naturally lose brightness due to phosphor degradation or internal material wear, often seen as “LED losing brightness over time.” This process accelerates if the LED operates under high current or temperature. A typical LED might lose 30% of its brightness after 50,000 hours under normal conditions, but this can happen much faster if driven at 1.5 times its rated current.
Unfortunately, degradation is irreversible. However, engineers can extend LED lifespan by operating them within recommended parameters (e.g., keeping current below 80% of the maximum rating). If brightness loss is significant, replacing the LED may be the only solution.
5. Environmental Factors and Poor Connections
Environmental conditions like high humidity or dust can affect LED performance, leading to issues like “LED dim after short time.” Corrosion on connectors or solder joints can increase resistance, reducing current flow and causing dimming. Similarly, loose connections in the circuit can result in intermittent brightness or flickering.
Inspect all connections for signs of corrosion or looseness. Use a continuity tester to check for breaks in the circuit. Applying dielectric grease to connectors in humid environments can prevent future corrosion and ensure consistent performance.
Step-by-Step Guide to Diagnose LED Brightness Problems
Now that we’ve covered the common causes, let’s walk through a systematic approach to diagnose LED brightness issues. This process is designed to help engineers identify the root cause of problems like “LED brightness fluctuating” or dimming unexpectedly.
Step 1: Verify Power Supply and Voltage Levels
Start by measuring the voltage and current at the LED using a multimeter. Compare these values against the LED’s datasheet. For instance, if a 5V LED receives only 4.2V, a voltage drop is likely the issue. Check the power supply rating and cable length to ensure they meet the system’s needs. If necessary, relocate the power source or use a booster circuit to stabilize voltage.
Step 2: Inspect for Thermal Issues
Use an infrared thermometer or thermal camera to measure the LED’s operating temperature. If it exceeds the recommended threshold (e.g., 85°C), improve thermal management by adding heat sinks or fans. Ensure the ambient temperature around the LED doesn’t exceed 40°C for optimal performance.
Step 3: Test the Driver Circuit
Check the driver’s output with a multimeter to confirm it delivers the correct current and voltage. If the driver is faulty, replace it with a compatible unit. For example, a 12V LED strip with a flickering output might need a driver with a higher ripple suppression rating (e.g., less than 5% ripple).
Step 4: Examine Environmental Conditions and Connections
Look for signs of corrosion, dust, or loose wiring in the LED setup. Test circuit continuity to rule out connection issues. If the LED operates in a harsh environment, consider using protective enclosures or coatings to shield it from moisture and debris.
Step 5: Assess LED Age and Usage Conditions
If the LED has been in use for several years or operated beyond its rated parameters, degradation could be the cause. Review the system’s design to ensure current and voltage levels are within safe limits. If brightness loss is significant, plan for LED replacement.
Solutions to Fix LED Brightness Issues
Once you’ve diagnosed the problem, apply the appropriate solution to restore brightness. Below are targeted fixes for common issues like “LED light not as bright as expected” or “LED dim after short time.”
1. Upgrade Power Supply or Wiring
If voltage drop is the issue, use a power supply with a higher output capacity or shorten cable runs. For long LED strips, consider a parallel power feed at multiple points to maintain consistent voltage (e.g., every 2 meters for a 12V strip).
2. Enhance Thermal Management
Install larger heat sinks or active cooling solutions like fans to keep LEDs within safe temperature ranges. For high-power LEDs (e.g., 3W or more), use aluminum PCB substrates with a thermal conductivity of at least 1.5 W/m·K for better heat dissipation.
Related Reading: Understanding Metal Core PCBs for LED Lighting: A Comprehensive Guide
3. Replace or Adjust the Driver
Swap out faulty or mismatched drivers with ones that match the LED’s specifications. Opt for high-quality drivers with built-in protections against overcurrent and overvoltage to prevent future brightness issues.
4. Protect Against Environmental Damage
Seal connections and use weatherproof enclosures for LEDs exposed to harsh conditions. Regularly clean dust and debris from fixtures to maintain optimal performance and prevent dimming.
5. Replace Degraded LEDs
If an LED has lost significant brightness due to aging, replace it with a new unit. When selecting replacements, choose LEDs with a higher luminous efficacy (e.g., 120 lumens per watt) to ensure better performance over time.
Preventing LED Brightness Issues in Future Designs
Prevention is always better than troubleshooting. Engineers can design systems to minimize the risk of issues like “LED brightness fluctuating” or losing brightness over time by following these best practices.
1. Select the Right Components
Choose LEDs and drivers that match the application’s requirements. Always refer to datasheets for voltage, current, and thermal limits. For instance, pairing a 700mA LED with a driver rated for exactly 700mA risks overloading; opt for a driver with an 800mA capacity instead.
2. Design for Thermal Efficiency
Incorporate adequate heat dissipation in your PCB layout or enclosure design. Use thermal vias and high-conductivity materials to channel heat away from LEDs. Simulate thermal performance during the design phase to identify potential hotspots.
Related Reading: DIY LED Strip Lighting: Designing Your Own Custom PCB
3. Account for Environmental Factors
If LEDs will operate in humid or dusty environments, integrate protective measures like conformal coatings or IP-rated enclosures. This can prevent corrosion and maintain consistent brightness over time.
4. Monitor and Maintain Systems
Regularly inspect LED systems for signs of wear, overheating, or connection issues. Use monitoring tools to track voltage and current levels, ensuring they remain within safe ranges. Scheduled maintenance can catch small problems before they lead to significant brightness loss.
Conclusion: Mastering LED Brightness Troubleshooting
LED brightness issues like dimming after a short time, fluctuating brightness, or lights not being as bright as expected can disrupt projects and systems. By understanding the root causes—such as power supply problems, overheating, driver issues, degradation, and environmental factors—engineers can effectively diagnose LED brightness problems and apply the right solutions. Whether it’s upgrading components, improving thermal management, or designing with prevention in mind, this guide equips you with the tools to tackle “LED losing brightness over time” and other challenges.
With the step-by-step troubleshooting process and preventive tips provided, you can ensure your LED systems perform at their best. Keep this guide handy for your next project to maintain optimal brightness and efficiency in every application.


