ALLPCB


If you're looking to enhance the quality of your printed circuit board (PCB) designs, mastering PCB imaging techniques is key. Whether you're focusing on PCB image transfer, improving PCB image resolution, or boosting PCB image quality, understanding methods like Laser Direct Imaging (LDI) can make a significant difference. For hobbyists seeking DIY PCB tips, simple tweaks in your process can also yield professional results. In this comprehensive guide, we'll dive deep into the world of PCB imaging laser techniques and practical advice to elevate your etching process.
What is PCB Imaging and Why Does It Matter?
PCB imaging is the process of transferring a circuit design onto a board before etching. This step is critical because the accuracy and clarity of the image directly affect the final product's performance. Poor imaging can lead to misaligned traces, incomplete circuits, or even board failure. Whether you're a professional engineer or a DIY enthusiast, achieving high PCB image resolution and PCB image quality ensures that your design translates perfectly from software to the physical board.
Traditional imaging often involves using photomasks or UV exposure to transfer designs onto photoresist-coated boards. However, newer technologies like Laser Direct Imaging have revolutionized the industry by offering unparalleled precision. Let's explore how these methods work and how they can improve your results.
Understanding Traditional PCB Imaging Techniques
Before diving into advanced methods like PCB imaging laser technology, it's important to understand the basics of traditional imaging. Most conventional techniques rely on a photomask—a film or glass plate with the circuit design printed on it. This mask is placed over a photoresist-coated PCB, and UV light is used to expose the design onto the board. The exposed areas harden, while unexposed areas are washed away during development, leaving a pattern for etching.
While effective for simple designs, traditional methods have limitations:
- Resolution Constraints: Photomasks can struggle with fine traces below 0.1 mm, limiting PCB image resolution.
- Alignment Issues: Misalignment during exposure can cause defects, reducing PCB image quality.
- Environmental Sensitivity: Temperature and humidity can warp photomasks, leading to inconsistent results.
For hobbyists using DIY setups, these challenges are even more pronounced due to limited equipment and controlled environments. However, with the right DIY PCB tips, you can still achieve decent results, which we'll cover later.
What is Laser Direct Imaging (LDI) in PCB Manufacturing?
Laser Direct Imaging (LDI) is a cutting-edge technique that eliminates the need for photomasks by using a laser to directly write the circuit design onto the photoresist layer of the PCB. This method, often referred to as PCB imaging laser technology, offers superior precision and flexibility, especially for complex designs with fine traces.
In LDI, a computer-controlled laser beam scans the surface of the board, exposing the photoresist with pinpoint accuracy. This process allows for:
- Higher PCB Image Resolution: LDI can achieve trace widths as small as 0.025 mm (1 mil), compared to 0.1 mm with traditional methods.
- Improved PCB Image Quality: The laser eliminates defects caused by photomask imperfections or environmental factors.
- Faster Prototyping: Without the need to create and align photomasks, LDI speeds up the production process.
LDI is particularly beneficial for high-density interconnect (HDI) boards, where space is limited, and precision is paramount. For instance, modern smartphones and wearables rely on HDI boards with trace widths often below 0.05 mm, a feat nearly impossible with older imaging techniques.
Benefits of Laser Direct Imaging for PCB Fabrication
Switching to or understanding Laser Direct Imaging can transform your PCB production process. Here are some of the standout advantages:
1. Unmatched Precision and Accuracy
LDI ensures that every line, space, and via is placed exactly where it should be. With positioning accuracy within 0.01 mm, it outperforms traditional methods, especially for multi-layer boards where alignment between layers is critical.
2. Enhanced PCB Image Transfer for Fine Features
For designs requiring microvias or ultra-fine traces, LDI excels in PCB image transfer. It can handle line widths and spacings as narrow as 0.025 mm, making it ideal for advanced electronics.
3. Reduced Production Time
By eliminating the need for photomask creation and manual alignment, LDI cuts down on setup time. This efficiency is a game-changer for both prototyping and mass production.
4. Consistency Across Batches
Unlike photomasks, which can degrade over time or be affected by environmental conditions, LDI delivers consistent PCB image quality across every board, ensuring reliability in large-scale manufacturing.
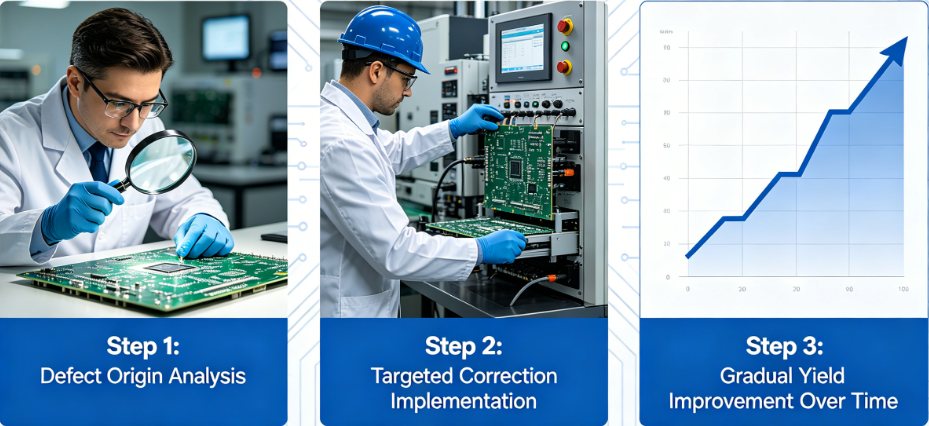
Challenges of Laser Direct Imaging
While LDI offers numerous benefits, it's not without its challenges. Understanding these can help you decide if it's the right fit for your needs:
- High Initial Cost: LDI equipment is expensive, often costing hundreds of thousands of dollars, making it less accessible for small-scale or DIY users.
- Technical Expertise: Operating LDI systems requires specialized training to optimize settings like laser power and scan speed for different photoresist materials.
- Limited Availability: Not all manufacturing facilities offer LDI services, though its adoption is growing rapidly.
For professional projects where precision is non-negotiable, these challenges are often outweighed by the benefits. However, DIY enthusiasts may need to rely on more accessible methods, which brings us to practical tips for improving imaging at home.
DIY PCB Tips for Better Imaging and Etching Results
If you're a hobbyist or small-scale designer without access to PCB imaging laser technology like LDI, don't worry. With the right approach, you can still achieve high PCB image resolution and PCB image quality using DIY methods. Here are some actionable DIY PCB tips to enhance your PCB image transfer process:
1. Choose the Right Photoresist Material
The type of photoresist you use significantly impacts imaging quality. Dry film photoresist, for example, is easier to handle and provides better resolution than liquid photoresist. Look for films with a thickness of 25-50 micrometers for optimal results on standard copper-clad boards.
2. Optimize UV Exposure Time
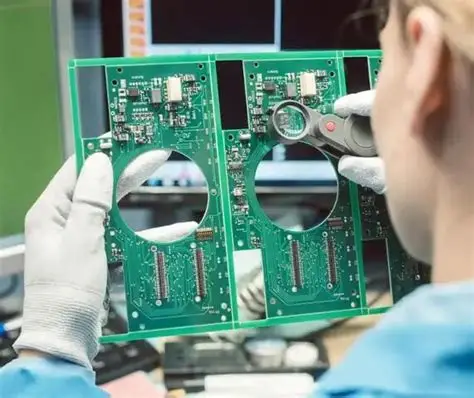
Overexposure or underexposure during PCB image transfer can blur fine details or leave unexposed areas. Test different exposure times with your UV light source—typically, 60-120 seconds for most hobbyist setups—and inspect the results under a magnifying glass to find the sweet spot.
3. Use High-Quality Artwork for Photomasks
Print your circuit design on high-resolution transparency film using a laser printer with at least 1200 DPI. Low-quality prints can result in fuzzy edges, reducing PCB image resolution. Ensure the toner is dense and completely opaque to block UV light effectively.
4. Maintain a Clean Workspace
Dust or debris on your board or photomask can cause defects in the transferred image. Work in a clean, dust-free environment, and handle materials with gloves to avoid fingerprints or oils that could interfere with PCB image quality.
5. Use a Vacuum Frame for Alignment
If possible, invest in or build a simple vacuum frame to hold the photomask tightly against the board during exposure. This minimizes gaps that can cause light scattering and blurry traces, improving PCB image transfer precision.
6. Fine-Tune Etching Conditions
After imaging, the etching process can also affect the final result. Use fresh etchant solution (like ferric chloride) at the recommended temperature—usually around 40-50°C (104-122°F)—to ensure clean, even removal of copper. Agitate the solution gently to avoid undercutting fine traces.
Comparing LDI with DIY Imaging Techniques
To help you decide which approach suits your needs, let's compare Laser Direct Imaging with traditional DIY methods across key factors:
| Factor | Laser Direct Imaging (LDI) | DIY Imaging (Photomask) |
|---|---|---|
| PCB Image Resolution | Extremely high (down to 0.025 mm traces) | Moderate (limited to 0.1-0.2 mm traces) |
| PCB Image Quality | Consistent, no environmental distortion | Varies with setup and conditions |
| Cost | High (equipment and service fees) | Low (affordable materials) |
| Accessibility | Limited to professional facilities | Easy for hobbyists with basic tools |
| Speed | Fast (no mask preparation) | Slower (requires mask creation) |
For professionals handling complex designs, LDI is the clear winner. However, with the right DIY PCB tips, hobbyists can still achieve impressive results without breaking the bank.
How to Choose the Right Imaging Method for Your Project
Selecting between LDI and DIY imaging depends on your project's requirements and budget. Consider the following:
- Design Complexity: If your PCB involves fine traces below 0.1 mm or multiple layers, LDI is worth the investment for superior PCB image resolution.
- Production Volume: For large batches, LDI's consistency and speed save time and reduce errors. For one-off prototypes, DIY methods are more cost-effective.
- Budget Constraints: If cost is a major factor, start with DIY imaging and upgrade to professional services as your needs grow.
Future Trends in PCB Imaging Technology
As electronics continue to shrink and demand higher performance, PCB imaging laser technologies like LDI are evolving. Emerging trends include:
- Multi-Wavelength Lasers: These allow for faster imaging and compatibility with a wider range of photoresist materials.
- AI-Driven Imaging: Machine learning algorithms are being integrated to optimize laser paths and predict potential defects before imaging.
- Affordable LDI Solutions: As adoption grows, smaller-scale LDI systems may become available for hobbyists and small businesses, bridging the gap between DIY and professional methods.
Staying informed about these advancements can help you prepare for future upgrades to your PCB fabrication process.
Conclusion: Elevate Your PCB Etching with Better Imaging
Improving your etching starts with mastering PCB imaging. Whether you're leveraging the precision of Laser Direct Imaging for professional projects or applying DIY PCB tips to enhance PCB image transfer at home, the right approach can significantly boost your PCB image resolution and PCB image quality. By understanding the strengths and limitations of each method, you can choose the best path for your specific needs and take your PCB designs to the next level.
At ALLPCB, we're committed to supporting your journey with resources and services tailored to both hobbyists and professionals. Keep refining your skills, and watch as your etching results transform from good to exceptional.