ALLPCB


Overview
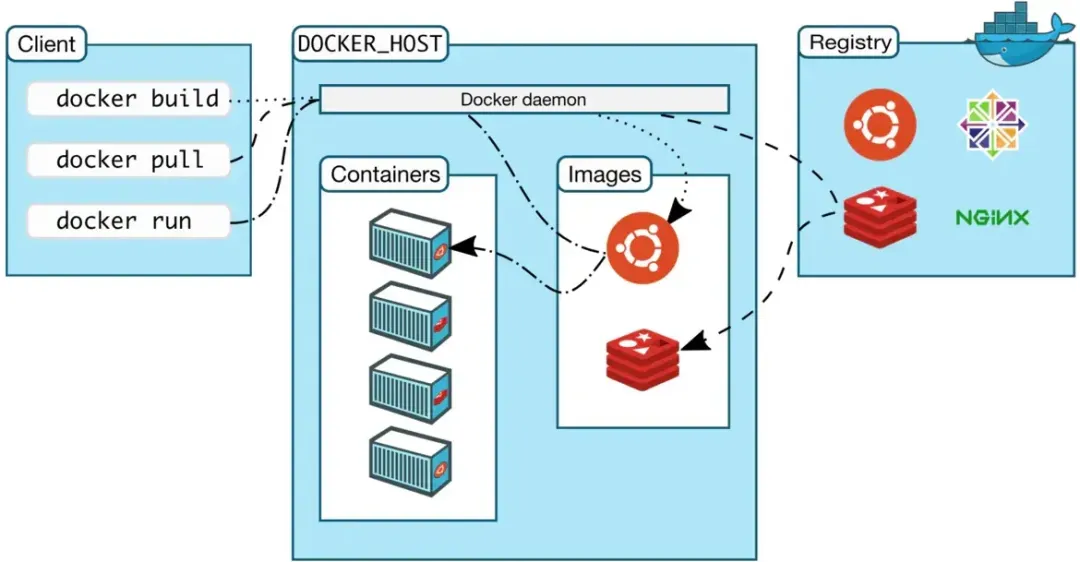
Docker is an open source platform for developing, shipping, and running applications. It uses containerization to package an application and all its dependencies into a self-contained runtime environment called a container. This ensures consistent behavior across environments, whether on a developer laptop, a test system, or a production server.
Docker makes it easier to build, deliver, and run applications while maintaining consistency and portability. It also enables flexible and efficient deployment because containers can be started, stopped, and scaled quickly without affecting other containers or the host system.
Docker on the Allwinner T113-i industrial platform
The following demonstrates how to install Docker, build images, and download and run containers on the Allwinner T113-i industrial platform.
1 Docker installation
1.1 Installation method
- Install dependencies
On Ubuntu, ensure network access and install Docker dependency packages with the following commands.
Host# sudo apt-get update
Host# sudo apt-get install ca-certificates curl gnupg lsb-release 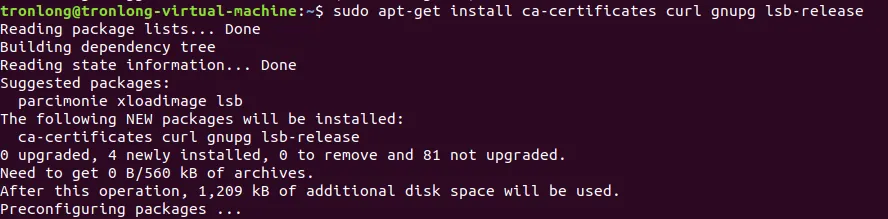
- Add Docker official GPG key
Host# sudo mkdir -m 0755 -p /etc/apt/keyrings
Host# curl -fsSL https://download.docker.com/linux/ubuntu/gpg | sudo gpg --dearmor -o /etc/apt/keyrings/docker.gpg 
- Set Docker Stable repository
Host# echo "deb [arch=$(dpkg --print-architecture) signed-by=/etc/apt/keyrings/docker.gpg] https://download.docker.com/linux/ubuntu $(lsb_release -cs) stable" | sudo tee /etc/apt/sources.list.d/docker.list > /dev/null 
- Install Docker
Host# sudo apt-get update
Host# sudo apt-get install docker-ce docker-ce-cli containerd.io 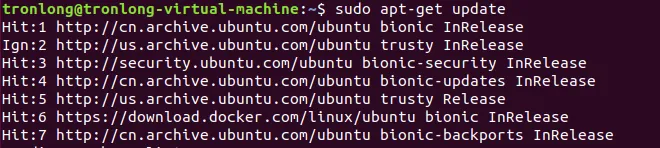
- Verify Docker
Run the supplied hello-world image to verify the installation. Successful output indicates Docker is installed correctly.
Host# sudo docker run hello-world 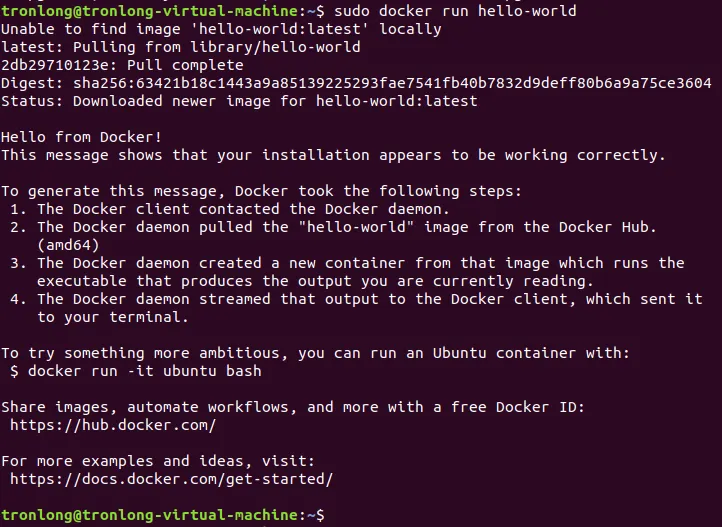
1.2 Set up a local image registry
Docker Registry stores user-built images. Registries can be public or private. Docker Hub is the public registry operated by Docker for sharing and storing images.
In this example, use the registry:2 image. The following commands download and start the registry container.
Host# mkdir -p /home/tronlong/docker/myregistry
Host# sudo docker run -d -p 5000:5000 -v /home/tronlong/docker/myregistry:/var/lib/registry registry:2 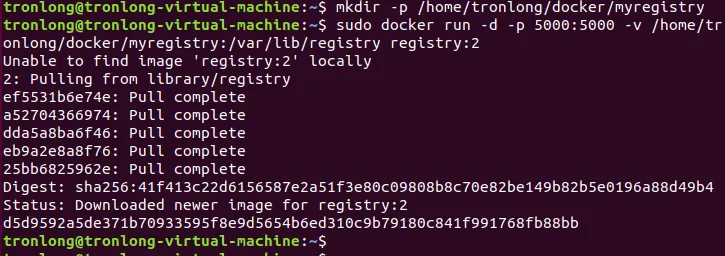
Check whether the container is running:
Host# sudo docker ps 
Access "http://192.168.10.101:5000/v2/_catalog" in a browser. A valid response indicates the registry is running. 192.168.10.101 is the Ubuntu host IP in this example.
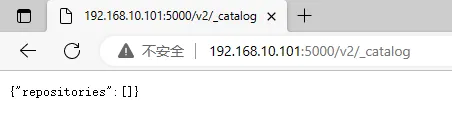
Initially the registry will have no images. At this point the Docker environment is installed and the local registry is running.
2 Build an image
Create a working directory on Ubuntu at "/home/tronlong/docker/dockerfile/". Copy the filesystem tarball from the product materials and the executable from the demo package into the shared Ubuntu directory, then copy them into the Docker working directory as shown below.
Host# mkdir /home/tronlong/docker/dockerfile
Host# cp /mnt/hgfs/SharedFolders/led_flash /home/tronlong/docker/dockerfile/
Host# cp /mnt/hgfs/SharedFolders/rootfs.tar /home/tronlong/docker/dockerfile/ 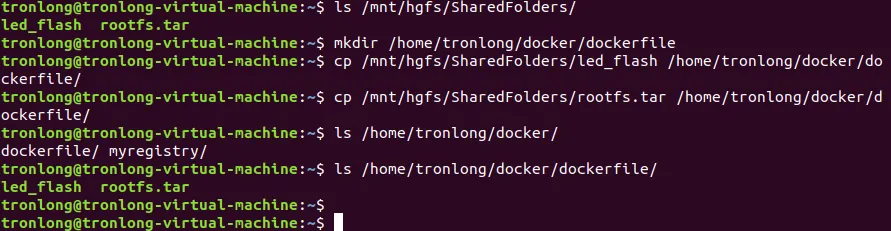
In "/home/tronlong/docker/dockerfile/" create a Dockerfile:
Host# cd /home/tronlong/docker/dockerfile
Host# gedit Dockerfile 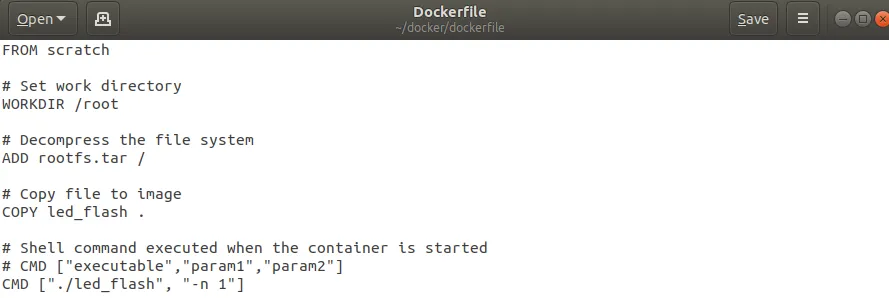
Dockerfile contents:
FROM scratch
WORKDIR /root
ADD rootfs.tar /
COPY led_flash .
CMD ["./led_flash", "-n 1"]
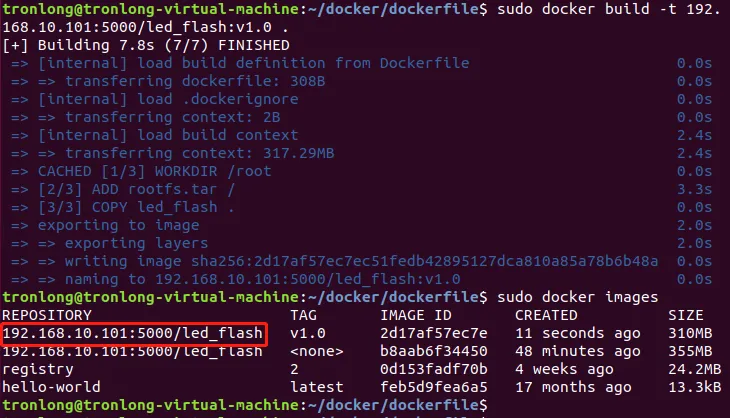
Build the image from the directory containing the Dockerfile:
Host# sudo docker build -t 192.168.10.101:5000/led_flash:v1.0 . 
Push the image to the local registry:
Host# sudo docker push 192.168.10.101:5000/led_flash:v1.0 ![]()
Docker 1.3.x and later use HTTPS by default when interacting with registries. The local registry in this example provides only HTTP, so interactions will fail unless the daemon is configured to allow insecure registries. Add the registry to "/etc/docker/daemon.json".
Host# sudo vi /etc/docker/daemon.json 
Add the following configuration to daemon.json:
{
  "insecure-registries": ["192.168.10.101:5000"]
}
Restart Docker and the registry container, then push the image again:
Host# sudo /etc/init.d/docker restart
Host# sudo docker ps -a
Host# sudo docker start 0833de1304d9
After pushing, access "http://192.168.10.101:5000/v2/_catalog" to view images in the registry.
3 Pull images and run containers
- Connect the T113-i evaluation board ETH0 (RGMII) port to the router via Ethernet and ensure it is on the same network as the Ubuntu host. Power on the board and pull the image, then list downloaded images.
Target# docker pull 192.168.10.101:5000/led_flash:v1.0
Target# docker images 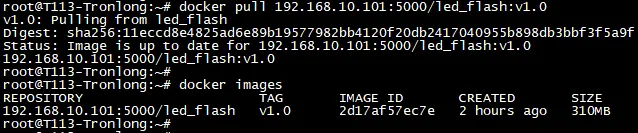
- Create and start the container. With the VFS storage driver, creating a container requires making a container layer by deep-copying the previous layer, which can take around 1 minute.
Target# docker run -d --name led_flash -v /sys/:/sys 2d17af57ec7e 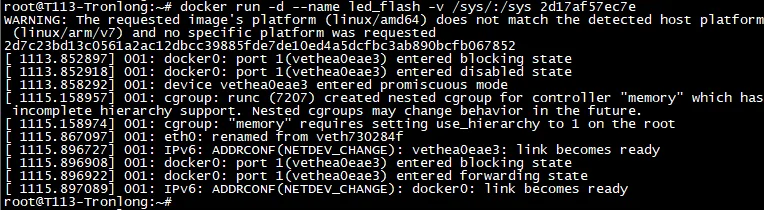
- Basic container operations
Target# docker ps -a
Target# docker exec -it 2d7c23bd13c0 /bin/bash ![]()
exit
Target# docker stop 2d7c23bd13c0
Target# docker start 2d7c23bd13c0
Note: If you encounter an error such as "x509: certificate signed by unknown authority" when interacting with a remote registry, add the registry to /etc/docker/daemon.json as an insecure registry or install the registry's certificate. The error indicates the local host does not have the remote registry's certificate.