 ALLPCB


If you're new to surface mount technology (SMT) and wondering how to apply solder paste accurately for your PCB assembly, SMT stencils are the key tool you need. In this guide, we'll break down SMT stencils explained in simple terms, explore stencil materials for beginners, dive into DIY stencil techniques, and share tips for low-cost PCB assembly and hand soldering stencils. Whether you're a hobbyist or starting small-scale production, this blog will help you understand the basics and make informed choices for your projects.
Let's get started with everything you need to know about SMT stencils, from what they are to how you can create and use them effectively on a budget.
What Are SMT Stencils? A Simple Explanation
SMT stencils, often called solder paste stencils, are thin sheets with precise cutouts (apertures) that match the layout of the pads on your printed circuit board (PCB). Their main job is to help you apply solder paste exactly where it's needed for surface mount components. By using a squeegee to spread solder paste through the stencil, you ensure the right amount lands on each pad, avoiding mess and mistakes during assembly.
These stencils are critical for both manual and automated SMT assembly. They save time, improve accuracy, and ensure consistent results, whether you're working on a single prototype or a small batch of boards. For beginners, understanding how to choose or create a stencil can make the difference between a frustrating soldering experience and a smooth, professional outcome.
Why SMT Stencils Matter for PCB Assembly
Without a stencil, applying solder paste by hand is nearly impossible to do accurately, especially for tiny components like 0402 resistors or fine-pitch ICs. SMT stencils solve this problem by acting as a template, ensuring the paste is deposited only on the pads where components will be placed. This precision is crucial for avoiding issues like solder bridges (short circuits) or insufficient solder, which can lead to weak connections.
For hobbyists and small-scale assemblers, stencils are a game-changer. They make it possible to achieve results close to professional standards without expensive equipment. Plus, they save time compared to manually dotting solder paste with a syringe, which can be inconsistent and tiring for larger boards.
Stencil Materials for Beginners: What to Choose
When it comes to selecting stencil materials for beginners, there are a few common options, each with its pros and cons. Your choice depends on your budget, the complexity of your PCB design, and whether you're buying a stencil or making one yourself. Here’s a breakdown of the most accessible materials:
1. Stainless Steel Stencils
Stainless steel is the industry standard for SMT stencils due to its durability and precision. These stencils are typically laser-cut to create exact apertures for solder paste. They’re ideal for both hand soldering and automated assembly because they can withstand repeated use without warping or wearing out.
- Pros: Long-lasting, high accuracy, suitable for fine-pitch components (down to 0.4mm pitch).
- Cons: More expensive than other options, especially for custom designs. Not ideal for one-off DIY projects due to cost.
- Best for: Small batch production or when you need reusable stencils.
2. Polyimide (Kapton) Film
Polyimide film, often referred to by its brand name Kapton, is a flexible, heat-resistant plastic material. It’s a popular choice for DIY stencils because it’s affordable and can be cut with laser cutters or even craft knives for simpler designs.
- Pros: Low cost, easy to work with for DIY projects, lightweight for hand soldering.
- Cons: Less durable than steel, may not hold up for repeated use, less precise for very small apertures (below 0.5mm pitch).
- Best for: Hobbyists doing one-off projects or experimenting with low-cost PCB assembly.
3. Mylar Sheets
Mylar is another plastic material, similar to polyimide but often thicker and more rigid. It’s commonly used in DIY stencil creation because it’s widely available and can be cut with accessible tools like vinyl cutters or lasers.
- Pros: Very affordable, easy to source, good for larger component sizes.
- Cons: Not suitable for fine-pitch designs, wears out quickly, can tear during use.
- Best for: Beginners testing DIY stencil techniques on simple boards.
DIY Stencil Techniques for Beginners
If you're on a tight budget or just want to experiment, creating your own SMT stencil at home is possible with DIY stencil techniques. While professional laser-cut stencils offer the best precision, DIY options can work well for simpler designs or prototyping. Here are a few methods to try:
1. Using a Vinyl Cutter for Mylar or Polyimide
Vinyl cutters, often used for crafts, can cut stencil designs into Mylar or polyimide sheets. You’ll need to design your stencil layout using software (many free tools are available) that matches your PCB’s pad layout. Export the design as a vector file, then use the cutter to create the apertures.
- Steps:
- Obtain your PCB design file and isolate the solder paste layer.
- Convert the layout to a format compatible with your vinyl cutter software.
- Cut the design into a 0.1mm to 0.2mm thick Mylar or polyimide sheet.
- Clean up any rough edges with a hobby knife for better paste application.
- Tip: This method works best for components with pad spacing larger than 0.8mm. Smaller pitches may result in uneven cuts.
2. Laser Printing on Transparency Film
For an ultra-low-cost option, you can print your stencil design onto transparency film using a laser printer. Then, use a hobby knife to manually cut out the apertures. While this method is time-consuming and less precise, it’s a good starting point for beginners with minimal tools.
- Steps:
- Print the solder paste layer of your PCB design onto transparency film.
- Lay the film over a cutting mat and carefully cut out each pad opening with a sharp knife.
- Secure the stencil to your PCB with tape during use to prevent shifting.
- Tip: Use a magnifying glass to ensure accuracy when cutting small pads.
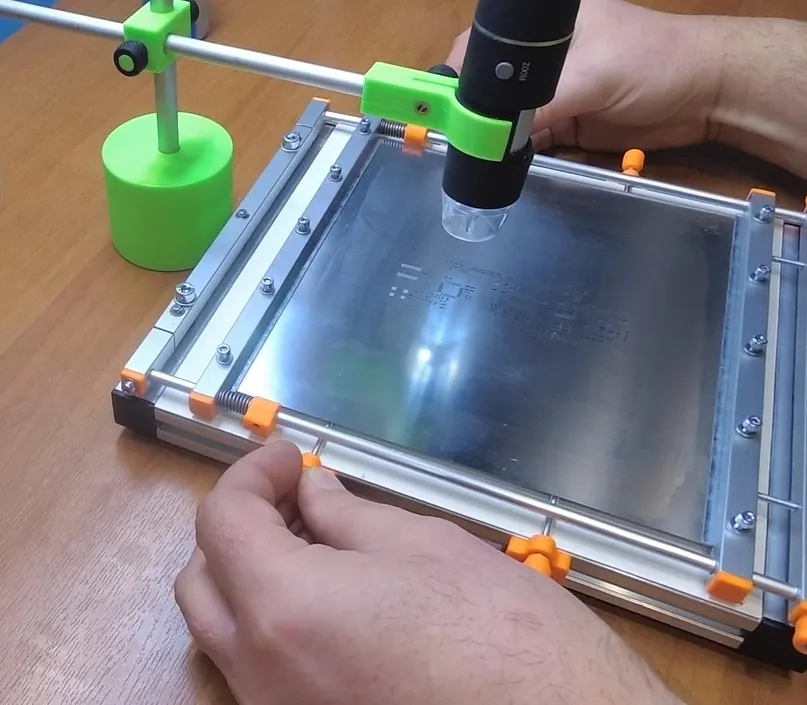
3. Laser Cutting for Precision
If you have access to a laser cutter (through a makerspace or shared workshop), you can create high-quality DIY stencils from polyimide or thin metal sheets. Laser cutting offers better precision than vinyl cutters and can handle finer pitches, down to about 0.5mm.
- Steps:
- Prepare your stencil design in a compatible file format for the laser cutter.
- Select a material like 0.1mm polyimide film for flexibility and affordability.
- Set the laser cutter to a low power setting to avoid burning the material, and cut the design.
- Test the stencil on a scrap PCB to check for alignment and paste deposition.
- Tip: Always wear protective gear and follow safety guidelines when using a laser cutter.
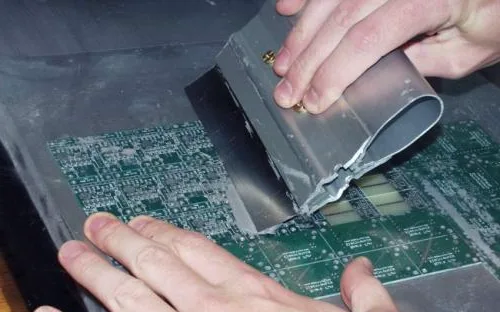
Hand Soldering Stencils: Tips for Manual Assembly
For hobbyists and small projects, hand soldering stencils are often the go-to choice. These are typically frameless stencils designed for manual use, as opposed to framed stencils used in automated machines. Here are some practical tips for using hand soldering stencils effectively:
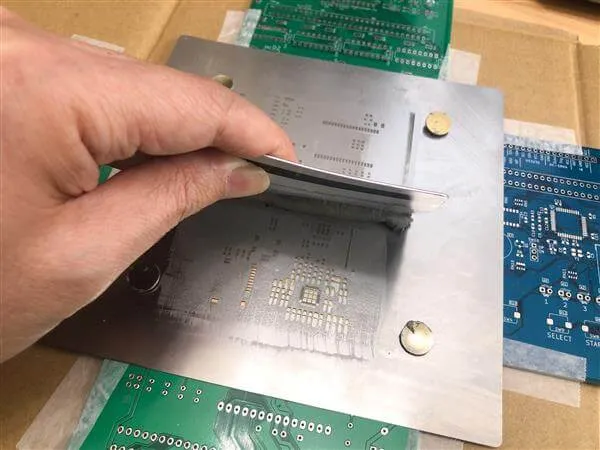
- Alignment is Key: Use alignment marks (fiducials) on your PCB and stencil to ensure perfect positioning. If your stencil doesn’t have fiducials, you can add small holes or marks manually to match reference points on the board.
- Secure the Stencil: Tape the stencil to your work surface or use a simple jig to hold the PCB and stencil in place. Movement during paste application can ruin the process.
- Use the Right Squeegee: A small metal or plastic squeegee works best for hand soldering. Apply even pressure at a 45-degree angle to push solder paste through the apertures.
- Control Paste Amount: Too much solder paste can cause bridges between pads. Use just enough to cover the apertures, and wipe excess paste off the stencil after each pass.
- Clean Immediately: After use, clean the stencil with isopropyl alcohol and a lint-free cloth to remove leftover paste. Dried paste can clog apertures and ruin future applications.
Hand soldering with a stencil can achieve great results, even for components with a pitch as small as 0.65mm, if you take your time and practice the technique.
Low-Cost PCB Assembly with SMT Stencils
For those focused on low-cost PCB assembly, SMT stencils are a budget-friendly way to improve quality without breaking the bank. Here’s how to keep costs down while still getting good results:
- Opt for Reusable Materials: If you’re doing multiple projects, invest in a stainless steel stencil. Though the upfront cost is higher (often $10–$30 for a small custom design), it can be reused hundreds of times, saving money in the long run.
- Batch Your Designs: If ordering a professional stencil, combine multiple PCB designs into one stencil sheet to reduce per-design costs.
- DIY for Prototypes: For one-off prototypes, stick to DIY methods like Mylar or polyimide stencils. Materials for these can cost as little as $1–$5 per sheet.
- Minimize Solder Paste Waste: Buy small syringes of solder paste (10–20 grams) for hobbyist use, and store them properly to extend shelf life. A small amount goes a long way with a stencil.
By combining affordable stencil options with efficient assembly practices, you can achieve professional-looking SMT soldering without expensive equipment. For example, a typical hobbyist setup with a DIY stencil, a $5 squeegee, and a $10 syringe of solder paste can handle dozens of small boards before needing replacement materials.
Common Mistakes to Avoid with SMT Stencils
As a beginner, it’s easy to make mistakes when using SMT stencils. Here are some pitfalls to watch out for and how to avoid them:
- Misalignment: Always double-check that your stencil is perfectly aligned with the PCB before applying paste. Even a 0.1mm offset can cause soldering issues.
- Using the Wrong Thickness: Stencil thickness affects how much solder paste is deposited. For most SMT components, a thickness of 0.1mm to 0.15mm works well. Thicker stencils (0.2mm or more) can deposit too much paste, leading to bridges.
- Poor Cleaning: Not cleaning your stencil after use can lead to clogged apertures, uneven paste application, and defective boards. Make cleaning a habit after every session.
- Overloading Paste: Applying too much pressure or paste with the squeegee can cause excess to seep under the stencil, creating messes. Use a light, even stroke instead.
How to Order Professional SMT Stencils
If DIY isn’t for you or your project demands precision, ordering a professional SMT stencil is a worthwhile investment. Here’s what to consider when placing an order:
- Provide Accurate Files: Submit the solder paste layer from your PCB design file (usually in Gerber format) to ensure the stencil matches your board perfectly.
- Choose Frameless for Hand Soldering: Frameless stencils are lighter, cheaper to ship, and easier to handle for manual use compared to framed stencils designed for machines.
- Specify Thickness: Request a stencil thickness suited to your components. For standard SMT parts, 0.12mm is a common choice.
- Add Fiducials: If your PCB has alignment marks, ask for corresponding fiducials on the stencil for easier positioning.
Professional stencils typically cost between $10 and $50 for small to medium designs, depending on size and complexity, making them accessible even for hobbyists with multiple projects.
Conclusion: Start Your SMT Journey with Confidence
SMT stencils are an essential tool for anyone stepping into the world of surface mount technology. Whether you’re exploring SMT stencils explained for the first time, choosing stencil materials for beginners, experimenting with DIY stencil techniques, or aiming for low-cost PCB assembly with hand soldering stencils, this guide has covered the basics to help you succeed.
Start small by trying a DIY stencil with affordable materials like Mylar or polyimide if you’re on a budget. As you gain experience, consider investing in a durable stainless steel stencil for better results and longevity. With practice and the right tools, you’ll be able to assemble professional-quality PCBs right from your workspace. Take the first step today and see the difference a good stencil can make in your soldering projects!


