ALLPCB


If you're diving into manual assembly of printed circuit boards (PCBs) and wondering what tools are must-haves for working with solder wire, you're in the right place. The essential tools for manual assembly when using solder wire include a high-quality soldering iron for fine pitch components, a solder wire dispenser for easy handling, precision tweezers for SMD (Surface Mount Device) parts, sturdy PCB holders for stability, and magnification for soldering tiny components with accuracy. In this comprehensive guide, we'll break down each of these tools, explain why they matter, and provide practical tips to help you achieve professional results in your PCB assembly projects.
Why Manual Assembly with Solder Wire Requires the Right Tools
Manual assembly of PCBs is a skill that demands precision, patience, and the right equipment. Whether you're a hobbyist building a small prototype or a professional assembling complex circuits, using solder wire to create strong, reliable connections is a core part of the process. Without the proper tools, you risk damaging components, creating poor solder joints, or even injuring yourself. The tools we'll discuss are designed to make the soldering process smoother, safer, and more effective, especially when dealing with intricate designs or fine-pitch components.
1. Soldering Iron for Fine Pitch Components
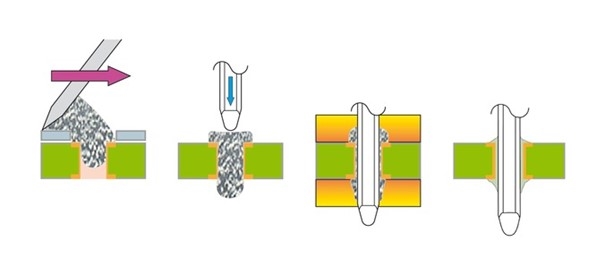
A soldering iron is the cornerstone of any manual assembly project involving solder wire. However, not just any soldering iron will do—when working with fine-pitch components (those with closely spaced leads or pads, often less than 0.5mm apart), you need a tool with precise temperature control and a fine tip. Fine-pitch soldering requires accuracy to avoid bridging (where solder connects adjacent pads) or damaging delicate components.
Look for a soldering iron with adjustable temperature settings, ideally between 250°C and 350°C, to match the melting point of your solder wire (typically around 183°C for lead-based solder and 217°C for lead-free). A wattage of 20-40W is usually sufficient for most PCB work. Additionally, choose a soldering iron with interchangeable tips, including a fine conical or chisel tip (around 0.5mm to 1mm in diameter) for precise application on small pads.
Using a soldering iron for fine pitch components ensures that you can work on modern, compact PCB designs without errors. Regularly clean the tip with a damp sponge or brass wire cleaner to prevent oxidation, and apply a thin layer of fresh solder (known as tinning) to maintain its effectiveness.
2. Solder Wire Dispenser for Easy Handling
A solder wire dispenser might seem like a small accessory, but it plays a big role in improving efficiency during manual assembly. Solder wire often comes in spools or coils, and trying to manage it by hand can lead to tangles, wasted material, or inconsistent feeding to the soldering iron. A solder wire dispenser holds the spool securely and allows you to pull out just the right amount of wire as you work.
Dispensers are especially useful when you're working on long projects or handling fine solder wire (diameters of 0.3mm to 0.8mm are common for delicate PCB work). Some dispensers even have built-in cutters or guides to help you measure and snip the wire cleanly. This tool keeps your workspace organized and lets you focus on soldering rather than wrestling with a loose spool.
For best results, pair your solder wire dispenser with a high-quality solder wire that matches your project needs. A 60/40 tin-lead alloy or a lead-free alternative with a rosin core flux is ideal for most electronics work, providing good flow and reliable joints.
3. Tweezers for SMD Components
Surface Mount Device (SMD) components are a staple in modern PCB designs due to their small size and efficiency. However, their tiny dimensions—often just a few millimeters or less—make them tricky to handle without the right tools. This is where precision tweezers for SMD components come in. These tweezers have fine, pointed tips that allow you to pick up, position, and adjust small parts with accuracy.
When choosing tweezers for SMD work, opt for non-magnetic, anti-static models made of stainless steel. Non-magnetic tweezers prevent interference with sensitive components, while anti-static properties protect against electrostatic discharge (ESD) that could damage electronics. Look for tweezers with a comfortable grip and tips as fine as 0.2mm for handling the smallest SMD parts, like 0402 resistors or capacitors.
Using tweezers, you can place components precisely on PCB pads before soldering, ensuring proper alignment and reducing the risk of errors. Keep a few different tip shapes (straight, curved, or angled) on hand to tackle various tasks during assembly.
4. PCB Holders for Stability
Stability is critical when soldering, especially for intricate manual assembly tasks. PCB holders, also known as PCB vises or third hands, are tools designed to secure your circuit board in place while you work. They prevent the board from shifting, allowing you to focus on applying solder wire accurately without worrying about movement.
PCB holders come in various designs, from simple clamps to adjustable arms with alligator clips or magnetic bases. Some models even include built-in magnification or lighting for added convenience. Choose a holder that can accommodate the size and shape of your PCB, with a stable base to prevent tipping. For small boards, a lightweight holder with flexible arms works well, while larger or heavier boards may require a more robust vise-style setup.
Using PCB holders not only improves precision but also enhances safety by keeping your hands free to handle the soldering iron and wire. This is especially important when working on fine-pitch components where even a slight shift can ruin a solder joint.
5. Magnification for Soldering Precision
When working with tiny components or fine-pitch designs, your eyes alone might not be enough to see the details clearly. Magnification for soldering is a game-changer, helping you inspect small pads, leads, and solder joints with clarity. This tool ensures that you can spot potential issues like cold joints, insufficient solder, or misplaced components before they cause problems.
There are several magnification options available. A magnifying glass with a stand (often called a helping hand) is a budget-friendly choice, offering 2x to 5x magnification. For more advanced setups, consider a desktop magnifier with built-in LED lighting, providing up to 10x magnification and better visibility. Alternatively, wearable magnifying visors or digital microscopes with USB connectivity offer even greater detail, with magnification levels up to 50x or more, ideal for professional work.
Magnification for soldering is essential for quality control. After completing a joint, use your magnifier to check for smooth, shiny solder that fully wets the pad and component lead. This attention to detail can prevent circuit failures down the line.
Additional Tips for Successful Manual Assembly with Solder Wire
Beyond these essential tools, a few extra practices and accessories can elevate your soldering game. Here are some tips to keep in mind:
- Flux for Better Solder Flow: Use flux alongside your solder wire to improve wetting and remove oxidation from pads and leads. Apply a small amount with a pen or brush before soldering for cleaner, stronger joints.
- Desoldering Tools: Keep a desoldering pump or wick handy to correct mistakes or rework joints. These tools help remove excess solder without damaging the board.
- Workspace Setup: Work in a well-ventilated area with good lighting. Use a soldering mat to protect your surface and keep tools organized.
- Safety First: Always wear safety glasses to protect your eyes from solder splashes, and avoid touching the hot tip of the soldering iron (which can reach over 300°C).
By combining the right tools with proper techniques, you can achieve professional-quality results in your manual assembly projects. Practice on scrap boards or kits to build confidence before tackling complex designs.
How to Choose the Right Tools for Your Needs
Selecting the best tools for manual assembly depends on your project scope, budget, and skill level. If you're just starting out, focus on basic, reliable equipment—a mid-range soldering iron for fine pitch work, a simple solder wire dispenser, and affordable tweezers for SMD components. As you gain experience, invest in advanced PCB holders and magnification for soldering to handle more intricate tasks.
Consider the types of projects you'll be working on. For hobbyists assembling small circuits, lightweight and portable tools are sufficient. For professionals dealing with high-density boards, prioritize durability, precision, and features like ESD protection or digital temperature readouts on soldering irons.
Always buy from reputable suppliers to ensure quality. Low-cost tools might save money upfront but can lead to frustration or damage to your work if they fail during critical tasks.
Conclusion: Building Your Soldering Toolkit
Manual assembly with solder wire is a rewarding skill that opens up endless possibilities in electronics design and repair. Equipping yourself with the essential tools—a soldering iron for fine pitch components, a solder wire dispenser, tweezers for SMD parts, PCB holders, and magnification for soldering—sets you up for success. Each tool plays a unique role in ensuring precision, safety, and efficiency, helping you create reliable connections and high-quality PCBs.
Start with the basics, refine your technique, and gradually expand your toolkit as your projects grow in complexity. With the right equipment and a bit of practice, you'll be soldering like a pro in no time. Keep your workspace organized, prioritize safety, and enjoy the process of bringing your electronic creations to life.